Toggle Nav

Pick Your Spot
The first tip in how to build a backyard rink: Find the perfect outdoor spot for it. Rule of thumb? The flatter and the more shaded, the better. Avoid highly sloped areas for better results. Find the most level area in your yard with relatively dry and solid soil (in close proximity to a water source) and you have found a location for your rink. For more details on choosing a spot to build an outdoor rink, click here.
Measure Your Working Area
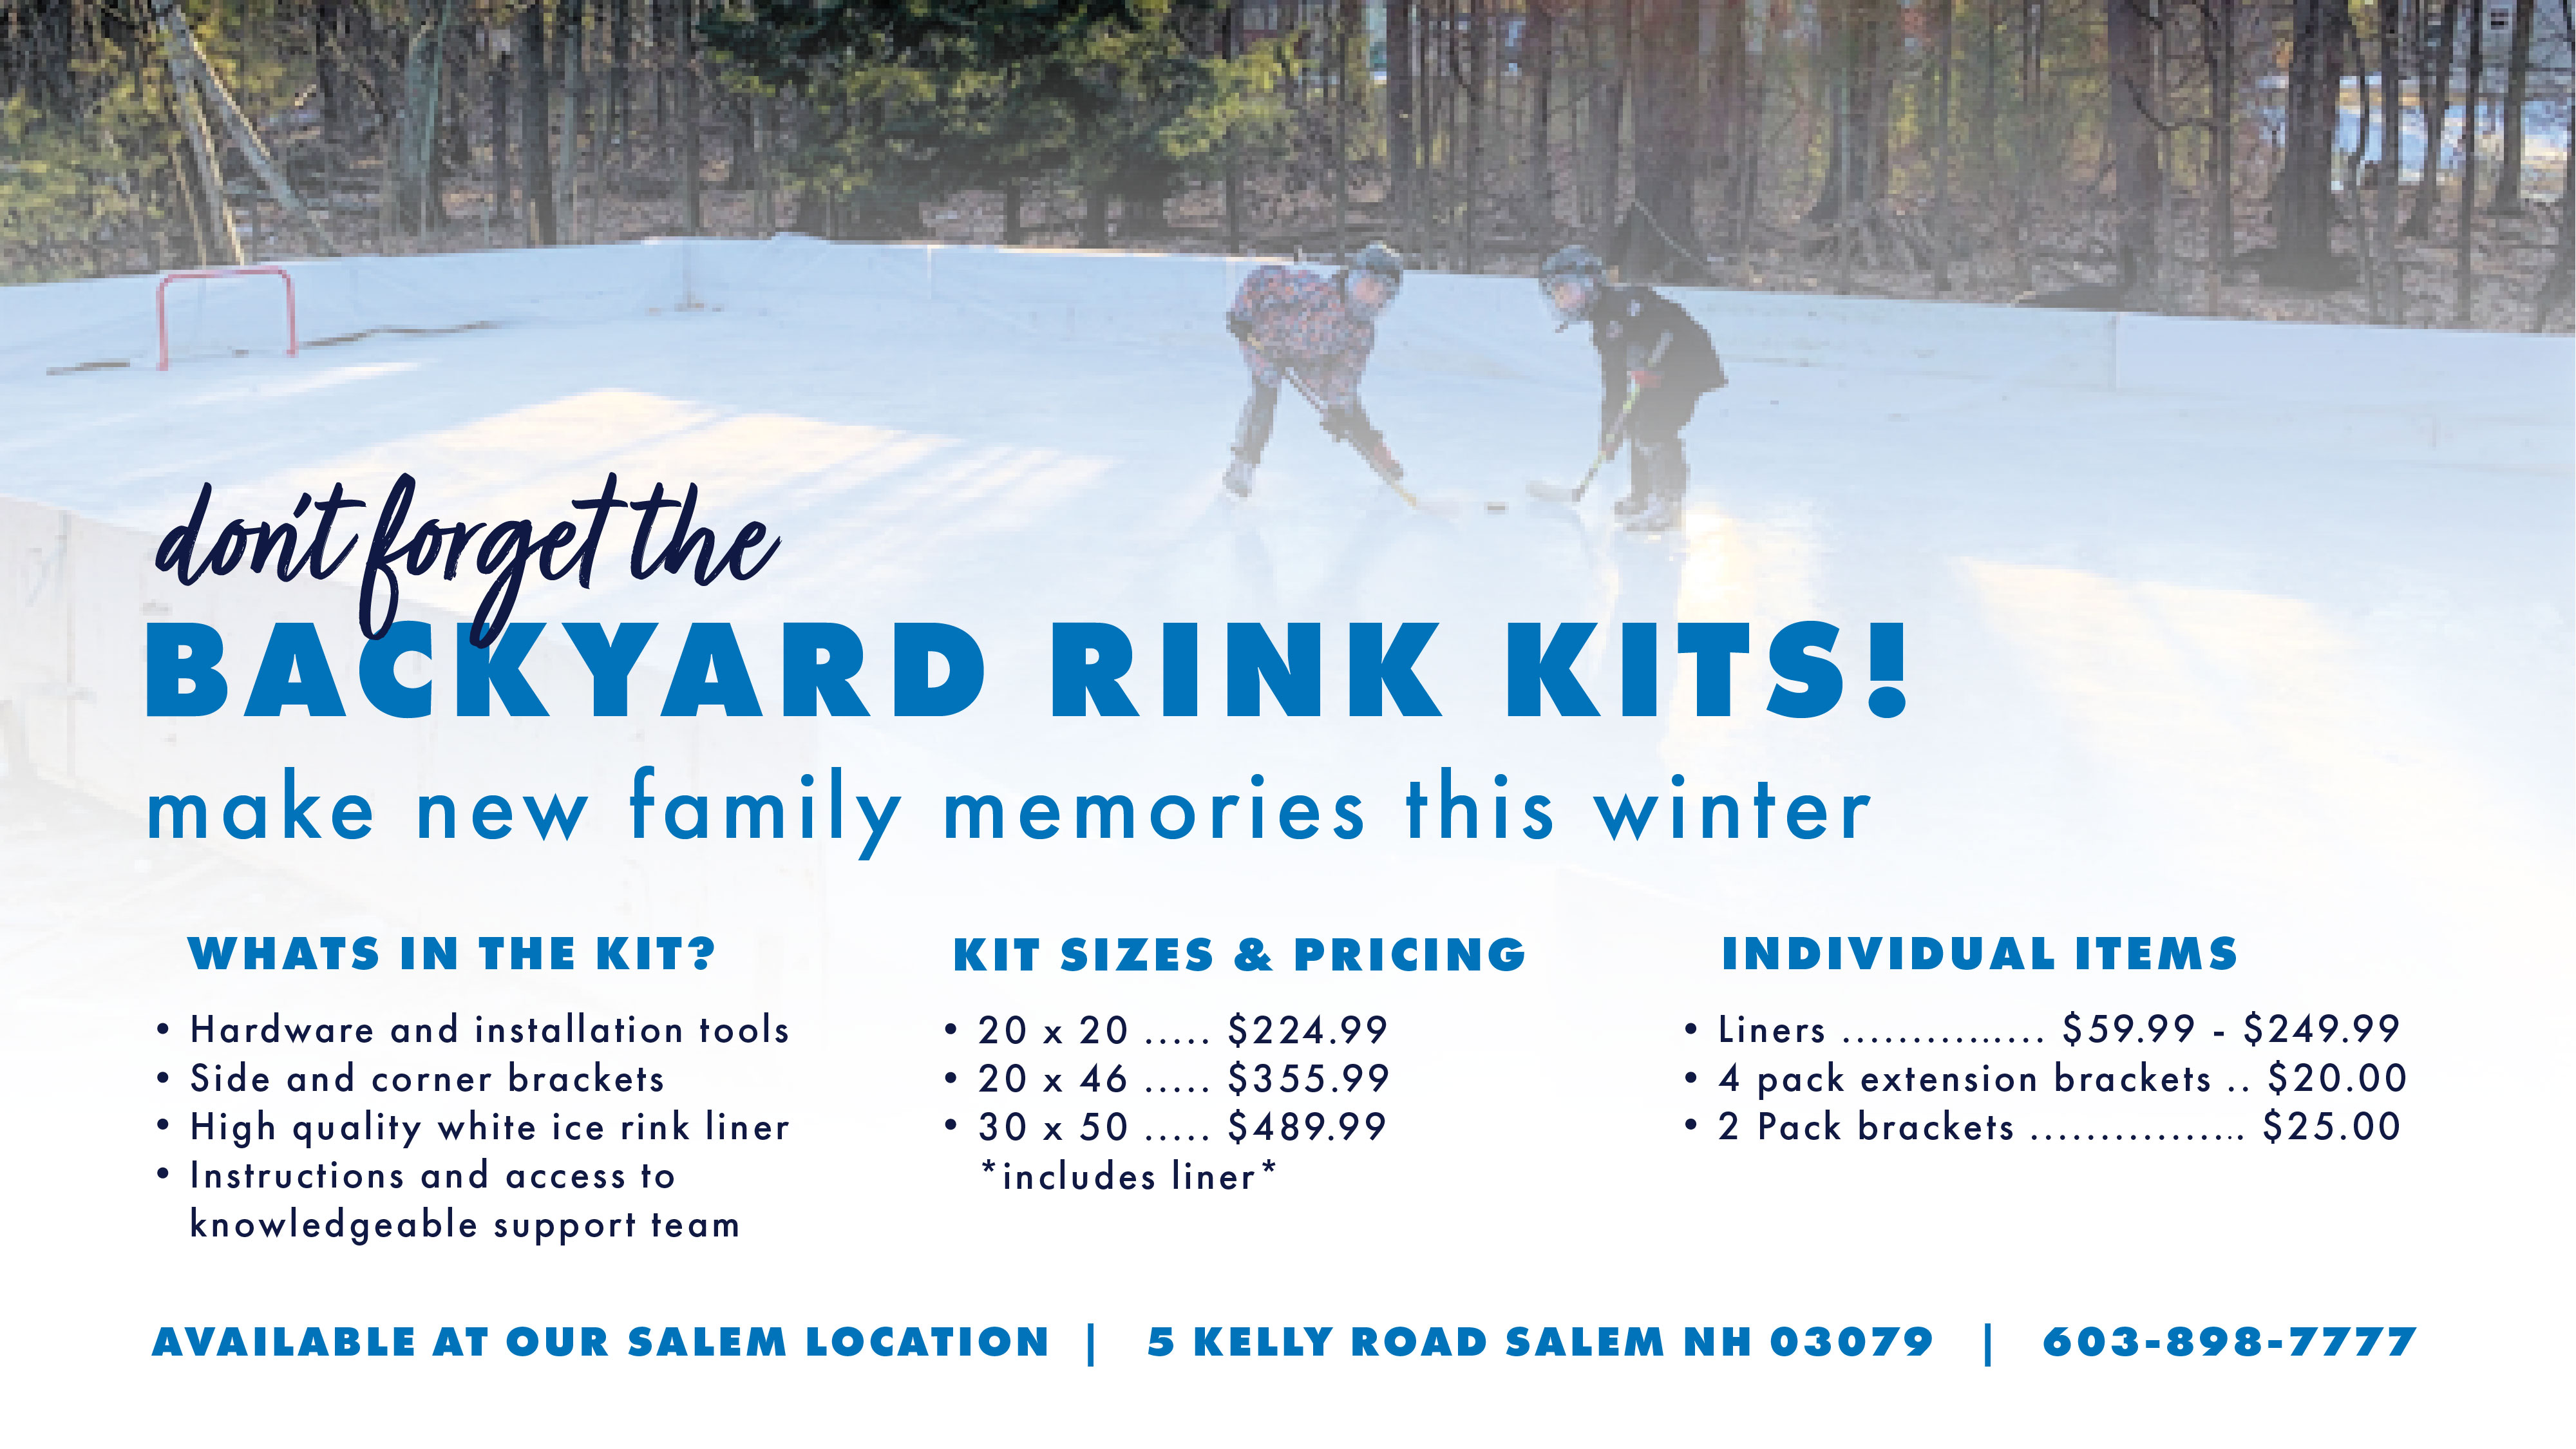
Once you've identified where your skating arena can go, you can pinpoint the size of the kit you can accommodate. When considering how to build an outdoor rink, keep it mind that it must fit on the selected workable area. When you purchase a kit from Iron Sleek, you will receive a liner that is at least 4-5 feet longer and 4-5 feet wider than the actual rink frame. Choose a size wisely. More rink means more maintenance. As your kids get bigger your rink should get bigger.
Survey Area
Pinpoint and document the grade/pitch of the arena outline using a transit laser or a string line level. Knowing the grade will determine the amount of support required to hold back the water pressure. Iron Sleek Brackets are spaced closer together for higher pitched sights. The grade will also guide the setting on your board heights. We also have a video on using a laser transit for those with access to one.
Layout And Build
You are officially ready to build your frame using Iron Sleek Rink System. Some things to remember during the process include:
- Choose lumber, plywood, or hockey rink boards for containment walls (NOT INCLUDED IN KITS)
- Follow the bracket spacing chart. Remember, 4 feet apart or tighter when using 3/4" plywood.
- Use Iron Sleek Corner Brackets to secure rink corners, use at least 2 steel brackets per corner. For more on corners click here.
- Iron Sleek's Ice Rink Extension Brackets allow for higher board heights due to excessive land grade (can be easily purchased aftermarket as needed after rink is built). If you have a lot of land grade, you may need our Ice Rink Outrigger Kit for sale as well.
Inspect Rink Boards
Once you've built out the frame, closely evaluate the inside of the rink boards for projections and/all sharp pieces that may puncture the liner. Additionally, determine that the frame proves solid and sturdy. You will also want to inspect the inside of your rink for anything that may tear the liner.
Fill In The Gaps
Inspect the bottom of your frame boards for large air gaps. The water filled liner will fill the air gaps looking like a water blister from the outside of the rink. This can create risk of puncture to the liner from the outside. If your fingers can fit between the bottom of the rink frame and the grass, you should fill the gap with Iron Sleek's Ice Rink Board Foam Cove for Sale. If cove is not in the budget, minimally backfill with packed dirt (never snow) to eliminate the space.
Line Away
The next step in how to build an outdoor rink in your backyard: Laying out the liner. Stretch the liner inside the frame, leaving plenty of slack to tuck into corners and around bottom of boards. Let excess liner drape over the rink frame and Iron Sleek Hardware to keep brackets dry and boards from absorbing too much heat. Watch this YouTube to see how to stretch a liner.
Fill It Up
You are ready to start filling your rink with water. Some things to consider:
- Cover your fill hose with a rag, sock or something non-abrasive before you place it in the rink.
- When filled, the lowest part of your rink should have at least 3 or 4" of water
- Never let water spill over frame
- If concerned about spilling over, turn off water and add 2nd story of lumber using Iron Sleek Extension Bracket.
Secure The Rink Liner
A loose liner can let water out. Now that your arena is filled, stapled the excess liner to the outside of the frame to keep it secured.
Skate, Skate, Skate!
Inspect your rink after 3-4 days of temperatures under 20 F to ensure you have the solid 3" of ice needed to skate (skating too soon can risk tearing the liner with a blade). No need to be overly scientific here, just walk the rink in your shoes first (not skates). Once the ice could support an adult without out water gushing up the side you should be good to skate, skate, skate!